Isn't it great when things come together?
Google's Tag Manager (aka GTM) was launched in 2012. It allows marketers and business owners to collect measuring and marketing data for their websites and apps without having to go through a web developer.
You work with the GTM instead of tweaking the code directly on a website. Changes, adjustments, and additions can be made quickly and without any special knowledge of scripts.
The Accelerated Mobile Pages (aka AMP) Project is an open source program unleashed just this year. It’s a stripped down version of HTML that loads up to 4x faster and consumes up to 10x less data than non-AMP pages.
Because it operates on a limited set of allowed technical functionality, Google claims AMP is 15-85% faster than traditional web pages. It’s all about providing a blazingly fast mobile experience.
Google unveiled the ability to use GTM with AMP a few weeks ago, and with the rising popularity of both, it’s definitely a welcome announcement.
GTM. AMP. The ultimate power couple. Here’s how to bring them together in as straightforward a way as possible.
The Google Tag Manager
The GTM - as the name implies - manages tags, snippets of JavaScript that send information to third-parties from either an app or website. With it, adding Google Analytics, or Adwords Conversion Tracking, or Doubleclick Floodlight is fast and easy for virtually anyone.
To start working with GTM, you must first add a custom tracking code (much like you did to set-up Analytics on your site). This container tag lets you create, manage, and debug all the tags on your site from one convenient location.
Go to the Google Tag Manager admin page. You can create your account in two simple steps:
Give it an account name (usually your company or website name)
Give it a container name (usually your domain or URL address), and select either Web for a website, iOS or Android for an app, or AMP to use it on accelerated mobile pages (more on that in a moment).
Click Create. C’est fini.
After reading and accepting the Terms of Service Agreement (you do read those, right?), you’ll receive the code that must be copied and pasted in the <head>, and immediately after the opening <body> tag of each page.
It may be a bit labor-intensive upfront, but once that lovely little snippet is on each page, you can add and remove tags to your entire site from one location. Create, adjust, and manage.
Alternatively, the Google Tag Manager for Wordpress plugin inserts the container code on your pages for you.
A good step-by-step guide can walk you through the basics. You’ll be amazed at the simplicity for such a powerful tool. Anyone can do it, regardless of their comfort level with coding and websites.
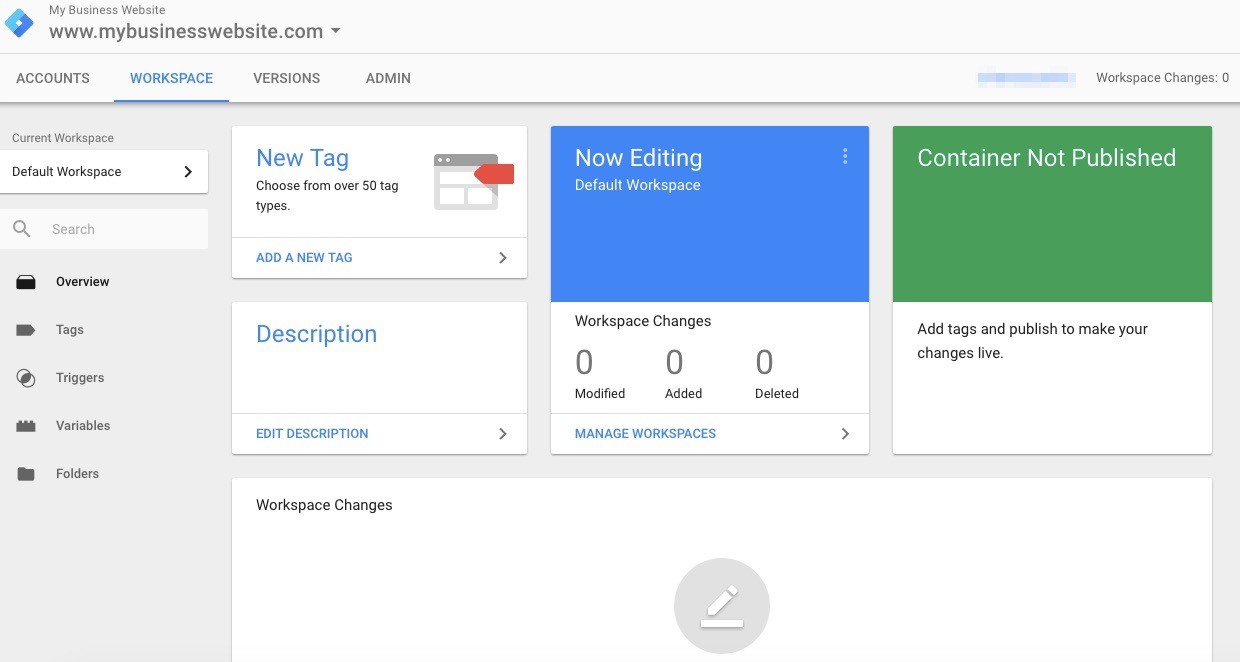
From the main dashboard, you’ll see tabs for:
Tags - snippet of code (most often JavaScript) added to either the <head> or <body> element of a page
Triggers - designate when and where tags are completed, or “fired”
Variables - receive and store information for the tags and triggers (you could create a constant variable and give it a value of your Google Analytics tracking code, for example, so you never have to find that detail again)
Folders
It may take a little while to get completely comfortable with it, but GTM is yet another free but dynamic tool from Google that quite literally puts your entire online empire in your hands. It comes with a jam-packed set of tags ready to go right out of the (virtual) box, as well as the ability to create and tweak your own for whatever you need. The platform plays well with a wide range of third-party applications besides other Google tools.
If you haven’t tried it yet, don’t wait any longer. There are a great many reasons to get onboard, including event and form tracking, and even scroll depth tracking, to name but a few. You can track almost anything (and tracking data is power when it comes to your online success).
The GTM? Two thumbs up.
Accelerated Mobile Pages
Accelerated Mobile Pages provide a stripped-down but souped-up version of the HTML used to build web pages. With limited tags, streamlined CSS, standardized JS elements, and designed to be cached, it delivers a faster mobile experience than ever before.
Mobile-friendliness is a ranking factor. Speed is a ranking factor. AMP speaks to both of those.
Made up of three main components - AMP HTML, the AMP JS library, and Google AMP Cache - it might seem scary at first, but you can create, preview, and publish your first AMP page today (right now, in fact).
Try the tutorial and see for yourself.
The Wordpress AMP plugin will automatically generate AMP-compatible versions of posts once activated. There’s also an equivalent Drupal module available. But if you have a lot of mobile traffic (and you probably do... check your Analytics demographics to confirm), you may want to create a dedicated AMP version of future posts.
Get Discovered
Making your AMP pages discoverable is pretty straightforward using <link> tags in the <head>:
Add <link rel="amphtml" href="https://www.example.com/url/to/amp/document.html"> to the non-AMP version
Add <link rel="canonical" href="https://www.example.com/url/to/full/document.html"> to the AMP page
Some platforms require additional meta data (ideally via the Schema markup) in order to display your result.
AMP and Analytics
We’ve been able to use Google Analytics with AMP properties for a while already. Just like a “regular” website, you just had to add the appropriate code to each page.
AMP Analytics consist of two parts:
The amp-analytics JavaScript library
JSON configuration object
To add Analytics to any AMP page, you must first include the following just before the closing <head> tag:
<script async custom-element="amp-analytics" src="https://cdn.ampproject.org/v0/amp-analytics-0.1.js"></script>
This script sets the stage to look for the specific “amp-analytics” element further down in the <body> of the page. At the moment, you have three Google Analytics configuration options in AMP:
‘pageview’ for page tracking (how many views of a particular page)

‘event’ for event tracking (user interaction independent of a page load)

“social” for social tracking (a social network related action)

A few tweaks and adjustments, and you’re pulling in oodles of Analytics data in those three areas.
Tag Manager with Accelerated Mobile Pages
But here’s the best part: with the new compatibility, you don’t need to do any of that. GTM has built-in AMP functionality, and setting it all up is a piece of cake.
Go to the GTM Admin page, enter an account (your business) and container (the web address) name, select AMP, and click Create.

On the next page, you’ll find the <head> and <body> codes that must be added to each page of your AMP site. Copy and paste.

You can verify the container installation and troubleshoot any issues with the Preview function found by clicking the arrow beside Publish in the top right corner of the main dashboard.

If everything is running smoothly, the first thing you’ll want to do is create a Google Analytics tag for your new AMP container.
On the main dashboard, select the Tags tab on the left, click the red “New” button, and choose Tag Configuration. From the list that slides in from the right, select Universal Analytics (it’s the very first one).
Enter your Analytics Tracking ID (Google recommends creating a separate Analytics property for AMP; your ID is found under Admin > Property > Tracking Info > Tracking Code and looks like UA-XXXXX-X), name the tag (Analytics or something similar), and select All Pages under Triggering. Click Save in the top right. Presto. Your first tag.
There are currently 25 AMP-supported tags ready to go, including Analytics, Adwords, and DoubleClick, and you can always create your own once you know your way around a bit better.
AMP Triggers
Triggers designate where and when tags will be fired (in this case, your Google Analytics tracking). Each tag must have at least one.
Go to Triggers > New > Trigger Configuration. There are five types of available AMP triggers:
Click - just one setting: CSS Selector, such as a:not([href*="mymobilesite.com"]), a:not([href*="mymobilesite.com"]) * to track outbound clicks, or a[href^="mailto:"], a[href^="mailto:"] * to track email clicks.
Page View - can be either All Page Views, or Some Page Views (for which you’ll then need to input what pages you want to be triggers)
Scroll - triggers when either a horizontal or vertical scroll hits a certain percentage threshold. You can include multiple thresholds separated by commas (e.g. 33, 66, 99, or just 66)

Timer - triggers whenever someone stays on a page past the designated interval (in seconds). The Limit field indicates the maximum number of trigger loops... just leave it blank for unlimited. If you want to cap it - and this gets a bit confusing - enter a multiple of your set Interval (e.g. 30 second interval, and you want it to fire up to 5 times, then enter a Limit value of 150).

Visibility - This one fires when an element (such as an ad) is visible in the browser for a set period of time. You need the Element ID, Minimum Percent Visible (enter at least 1, or the trigger will fire even when the element is not visible), Maximum Percent Visible, Minimum Continuous Time (in milliseconds), and Minimum Total Time (also in milliseconds).

Setting everything up is not hard. Mastering all the subtle nuances will take some time. The AMP integration is somewhat limited so far, but better than when it wasn’t included at all, so we’re heading in the right direction.
Give yourself time to come to grips with everything. Set up your basic Analytics tag today, and start experimenting tomorrow. It’s all about baby steps.
Have you used the Google Tag Manager with AMP yet? What are your thoughts so far? Leave your comments below:
Note: The opinions expressed in this article are the views of the author, and not necessarily the views of Caphyon, its staff, or its partners.

Article by
Mo Harake
Mo Harake brings over 12 years of ecommerce and digital marketing experience leading brands like FIJI Water, 7Diamonds, Kill Cliff and venture-backed startups to his work as Managing Director of Stray Digital. For more on his approach to ecommerce, content marketing and growth hacking, visit him on LinkedIn or at the Stray Digital blog.