
I've written a couple of blogs in the past on Google Tag Manager (GTM).
The first was a beginner's guide, and the second talked about the benefits of using a tag management system - specifically Google's. With that in mind, I think it's best to start moving on to more advanced implementations using GTM.
There are lots of things you can do using GTM, from installing third-party tags to event tracking and form tracking. Today I'm going to explain how to send a specific set of events to Google Analytics - how far people scroll down the page. First, let’s talk about why we need scroll depth.
Why is scroll depth important?
Engagement is something a lot of people talk about, but is rarely tracked - at least not on websites. Webmasters often hang their hats on what I would call “flimsy” metrics, such as time on page and bounce rate. Neither of these metrics tell the full story.
Say we use time on page as our engagement metric - what happens if someone spends 10 minutes on one page? Is that a good thing because they’re engaging with the content? Or is it a bad thing because they can’t find the content they are looking for?
Bounce rate has similar issues. If someone lands on a contact page and bounces straight off, you could argue they’ve found the information they’re looking for and left. This one example underlines the importance of tracking goals and conversions in analytics (you perhaps shouldn’t stop there either, and should consider implementing phone call tracking too - but let’s leave that for another post). Conversely, if they leave without finding that information, your site might have serious problems! This is when tools like Hotjar and Lucky Orange come in handy to record your users’ behaviour (again, let’s leave those for another post).
Regardless, from those examples I think it’s clear to see that you can’t just rely on bounce rate or time on page as engagement metrics. This is where scroll depth comes in.
Scroll depth has been a topic of conversation for some time, and Justin Cutroni detailed how you can implement it in 2014 using Universal Analytics. However, his post doesn’t talk about how you can do this with GTM. This post seeks to guide marketers and non-technical website administrators in how to add scroll tracking to your website.
Tracking scroll depth
The ability to track scroll depth (at least my version - there are other methods) involves a plugin created by Rob Flaherty. The plugin, which uses jQuery to record the data in GA, sends events to Google Analytics at various trigger points - Baseline (0%), 25%, 50%, 75%, and 100% - each signalling a different point where a user is in relation to the top and bottom of the page. Andy Gibson should also get a mention as he details this process for GTM Version 1, whereas my post updates his instructions for GTM V2.
There are a few requirements that you must have in order to complete this tutorial:
Your website uses Google Analytics (Classic and/or Universal Analytics)
Your site implements GA through Google Tag Manager
An understanding of GA + GTM
If you don’t meet those requirements, I strongly recommend you check out my aforementioned GTM guide in addition to the Google Tag Manager module in the Analytics Academy before continuing.
Create a custom HTML tag
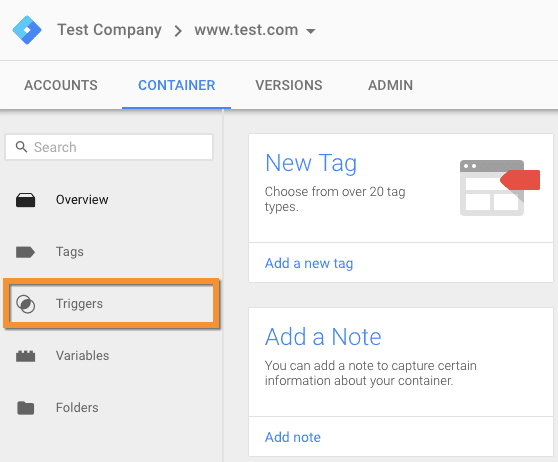
The first thing you’ll need to do is head over to the Google Tag Manager website, and find your website’s container. Once you’ve found the appropriate container, click the container name to head to the GTM interface:

Before we create our tag, I’d recommend creating a trigger (a tag firing rule) that ensures your scroll depth script fires when the DOM is ready.
What is the DOM? Well that’s quite a technical question! It stands for Document Object Model and is a representation of all the nodes (like p tags, divs, list items) in an HTML document. The DOM provides a method for JavaScript to interact with all these nodes. The DOM Ready trigger we will create means that the tag will fire after the browser has finished constructing the full page DOM.
To create the trigger, head over to the triggers section within GTM:
Once here, click ‘New’. Name your tag ‘DOM Ready’, choose the event ‘Page View’, your trigger type as ‘DOM Ready’, and set to fire on ‘All Pages Views’ (unless you don’t want certain pages to be included in your scroll depth tracking, then select ‘Some Page Views’ and choose your filters.
Your trigger should look similar to the below:
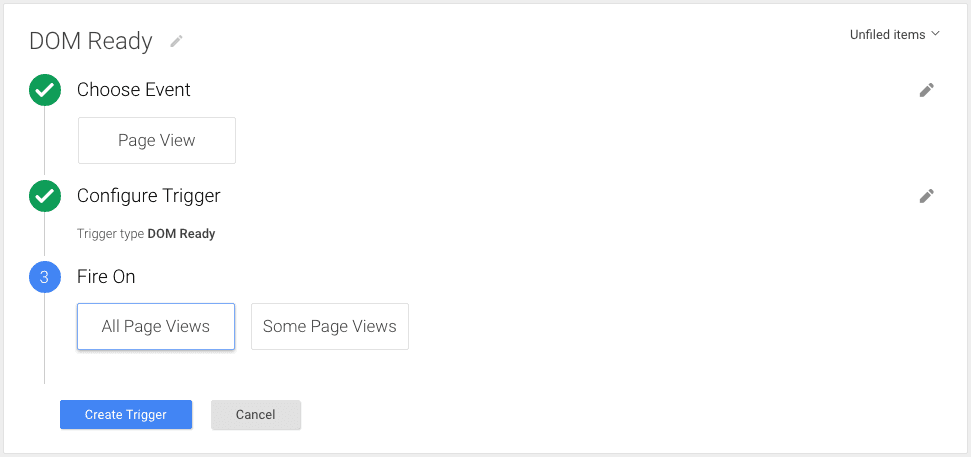
Before moving onto the next step, you’ll need to click ‘Create Trigger’.
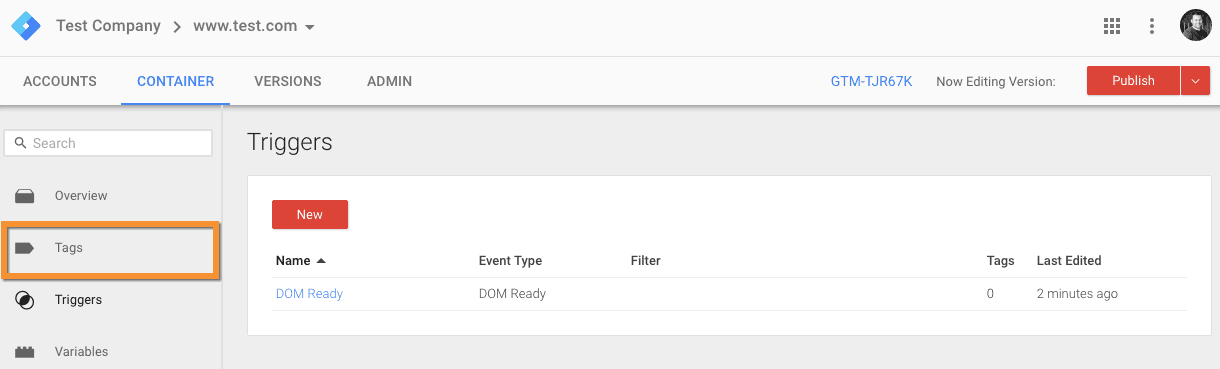
Next, you’ll need to create a new tag. Click ‘Tags’ in the left hand menu pane:
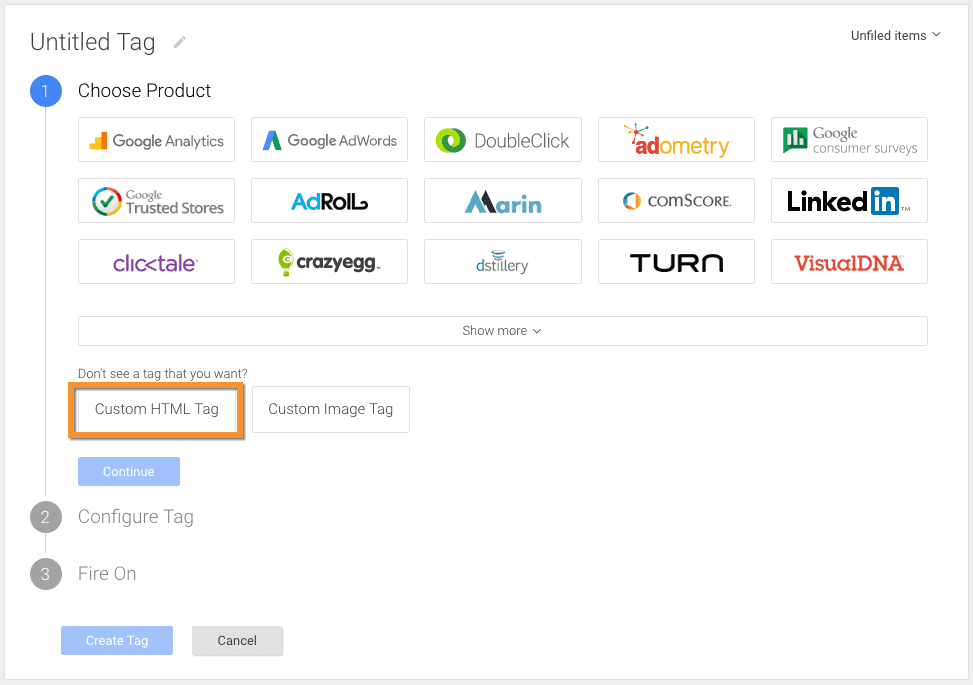
Then hit the ‘New’ button. Choose ‘Custom HTML Tag’ underneath all the standard tags:
You should then head over to the below URL and copy the scrolldepth.js file:
Once copied, paste the code into the vacant HTML field:
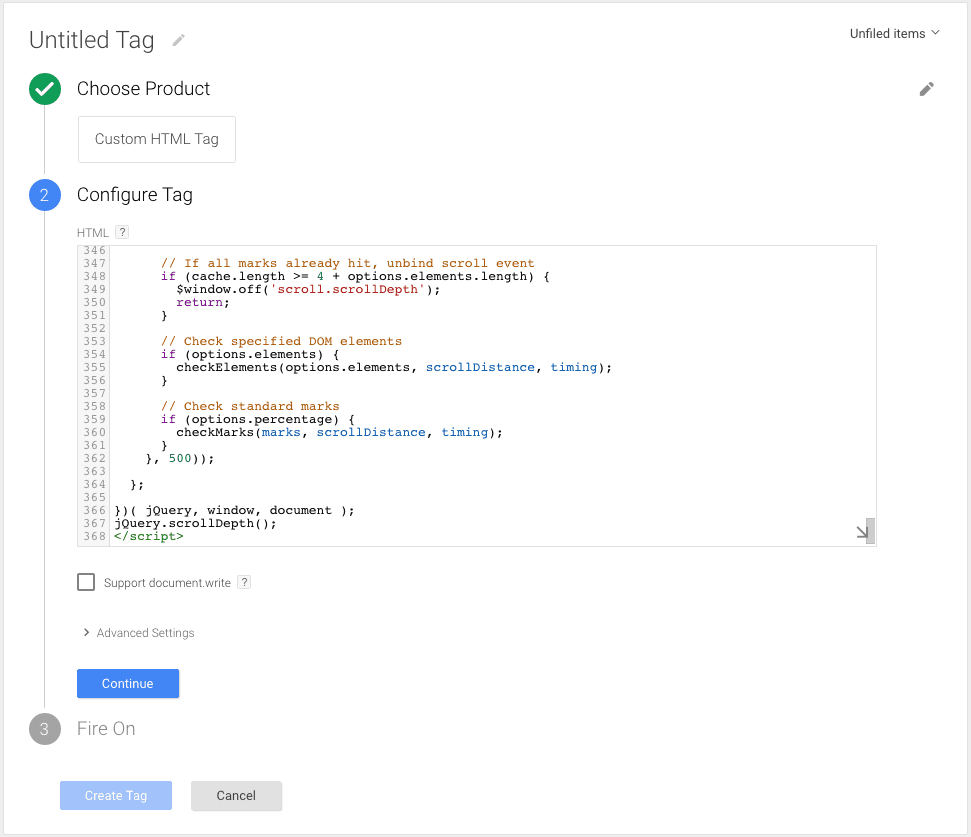
This script then creates a dataLayer push every time a scroll tracking event is fired.
The events in GTM are not pushed across to Google Analytics though. We need a separate tag in GTM to send the events across to GA - we’ll cover that shortly.
Once you have added the above code, hit ‘Continue’ and then click ‘More’:
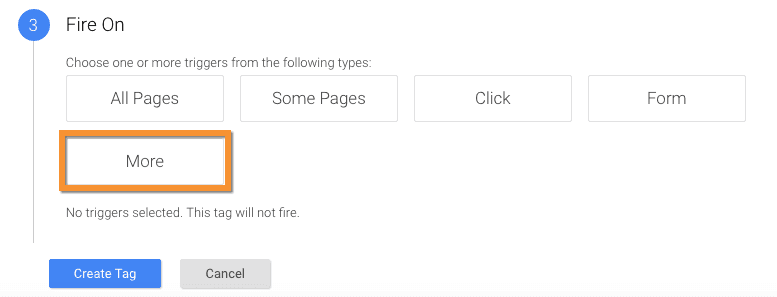
On the next screen, select the ‘DOM Ready’ rule you created earlier:
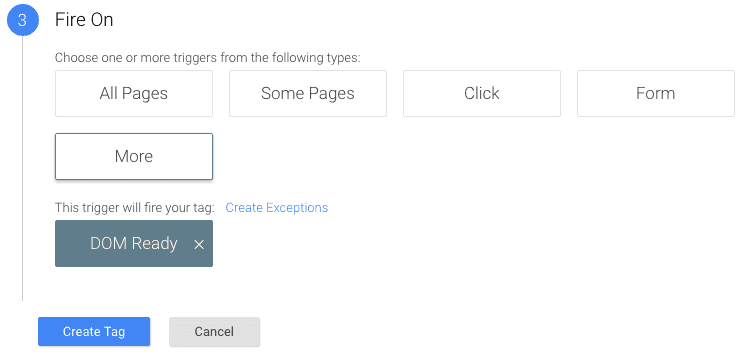
Click ‘Create Tag’, and if you haven’t already, name your custom HTML tag something descriptive. ‘Scroll Tracking Tag will do fine.
Creating event variables
Next, we need to create variables that define the event components so we can send them to GA. Remember, Google Tag Manager events are not the same as Google Analytics events.
Google Analytics events are made up of four components: Category, Action, Label and Value. The last two of those are optional.
We’ll be creating each of these as variables in Google Tag Manager. Why? Because in order to pass events from GTM to GA, we have to define these components by pulling the information from the dataLayer (this is a little complicated). Once we have created these variables we’ll then create a Google Analytics tag that is set to Event - this will then send the scroll depth events to Google Analytics.
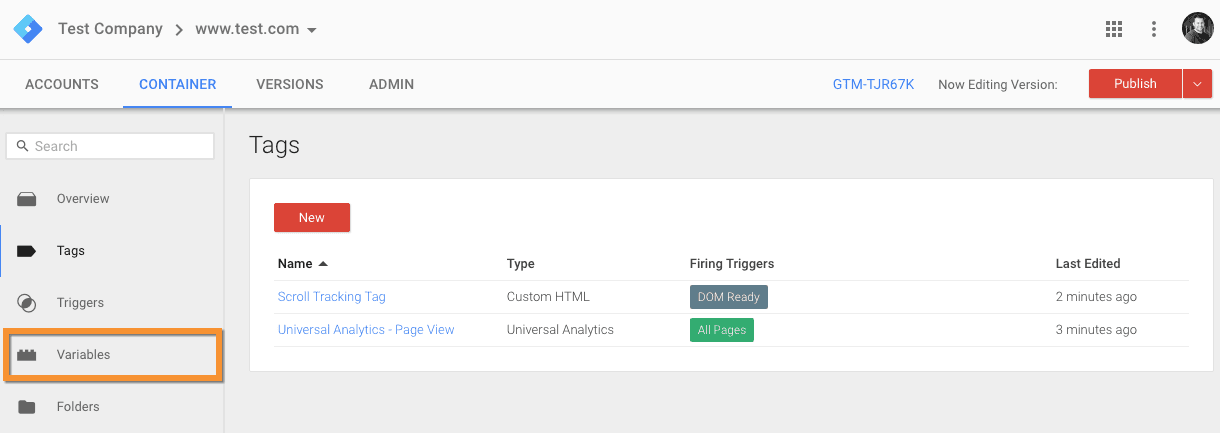
To create your variables, head over to the appropriate section using the left hand side menu:
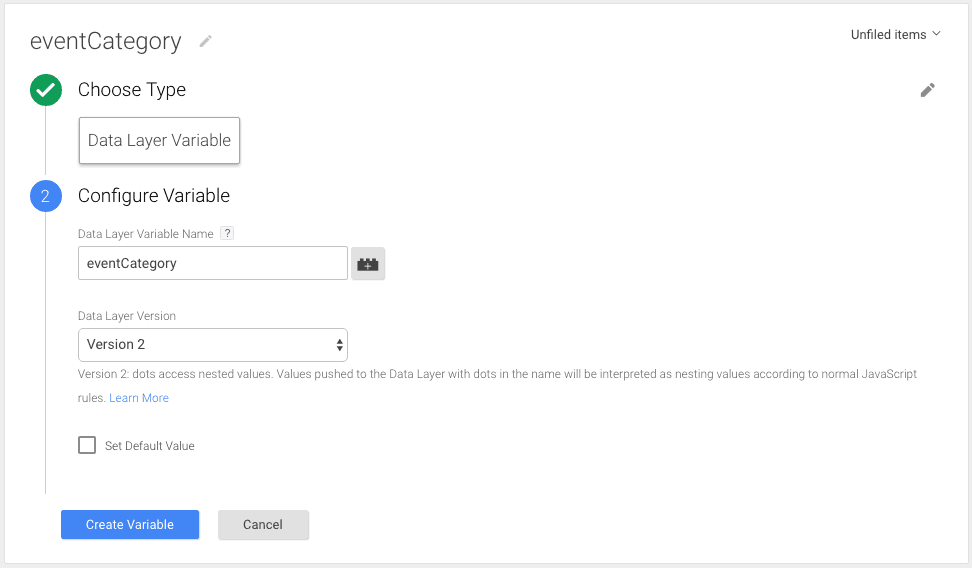
Event category variable
Click ‘New’ and name your first variable ‘eventCategory’. Select the type as ‘Data Layer Variable’, then enter the data layer variable name as ‘eventCategory’. Leave the version as ‘Version 2’. Click ‘Save’ and it should look like this:
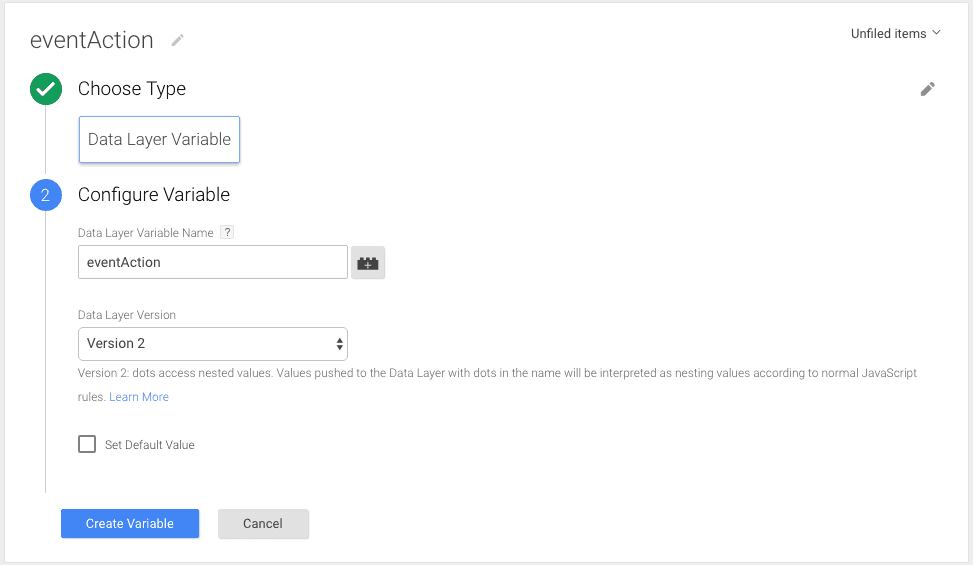
Repeat these steps for the action, label and value variables, but replace the variable name and data layer variable name with the following:
eventAction;
eventLabel;
eventValue.
I’ve included some screenshots below that show what each variable should look like.
Event action variable
Event label variable

Event value variable

Create the Google Analytics tag
Now we have our variables, we’re able to send the information that our scroll tracking JavaScript pushes to the data layer.
Head back over to the tags section, click ‘New’, and choose ‘Google Analytics’. Again, name the tag something descriptive, select your version of GA (Universal or Classic), and input your GA property ID (or insert your own variable within GTM that dynamically pulls in this ID). Then change the track type to ‘Event’.
Once selected your screen should look something like the below:
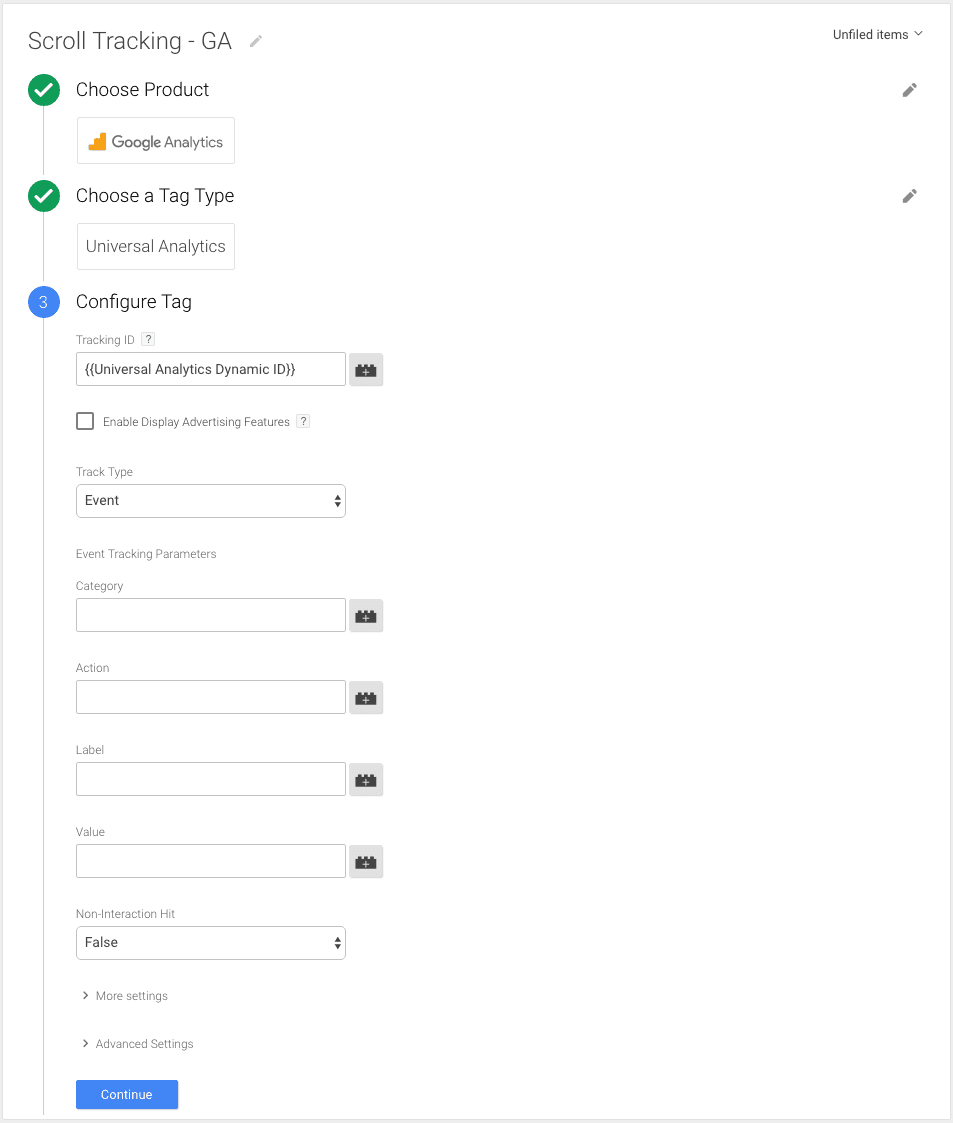
We now have the ability to enter the variables we just created. Click the building block button on the right of each of the ‘Category’, ‘Action’, ‘Label’ and ‘Value’ text fields and select the appropriate variable:
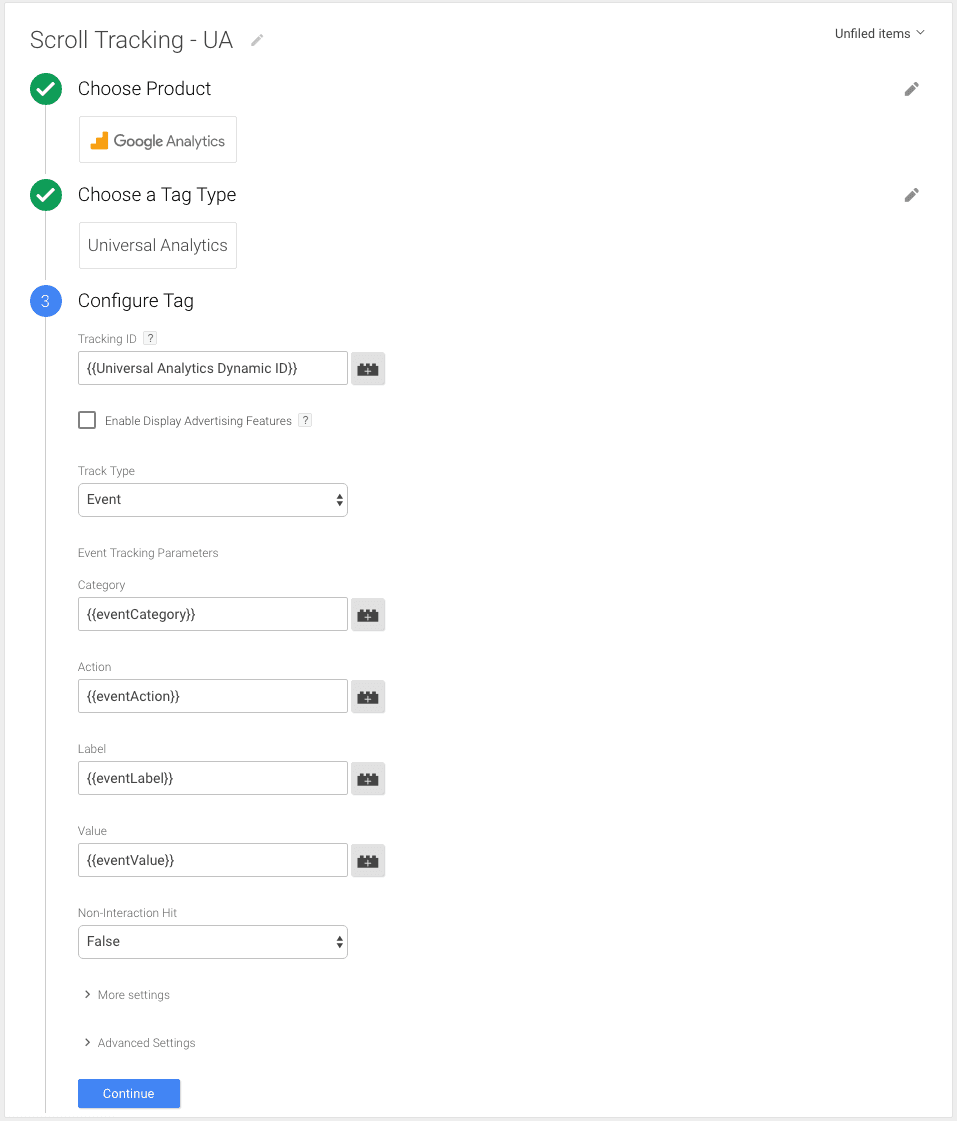
You can then decide whether you want scroll events to affect your web page’s bounce rates. If you want your bounce rate unaffected, set the non-interaction event to ‘True’. However, if you believe that a scroll down your page does not constitute a bounce you can select the non-interaction hit to be ‘False’ so that any scroll activity greater than 25% will not affect your site’s bounce rate. Be warned though - by setting this option as false it’s likely your website’s bounce rate will be less than 5%!
The last thing you need to do is to set the firing rule for this tag. When you have clicked continue, select ‘More’ from the options, and then click ‘New’ from the pop up. Name the trigger ‘Event equals ScrollDistance’, select ‘Custom Event’ and enter ‘ScrollDistance’ in the event name field:
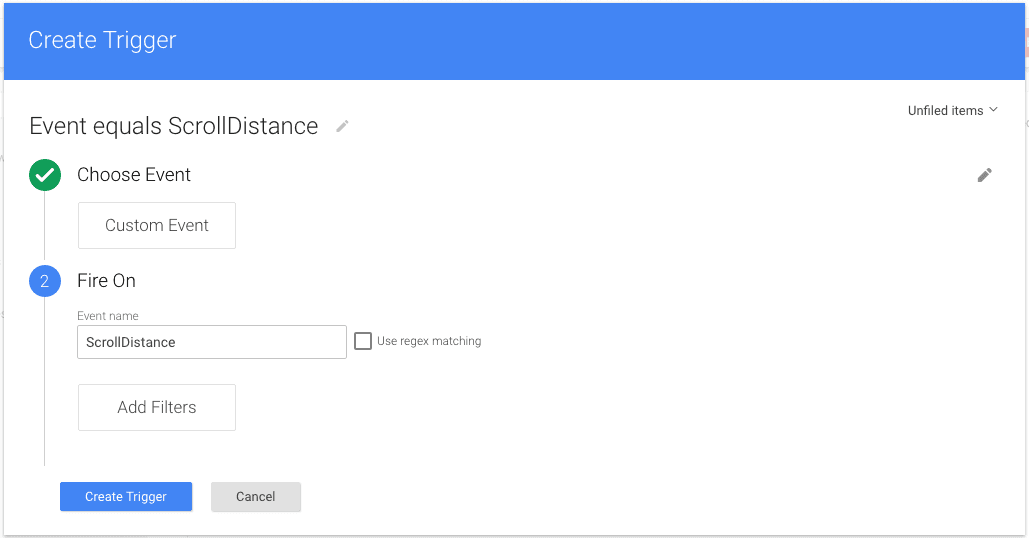
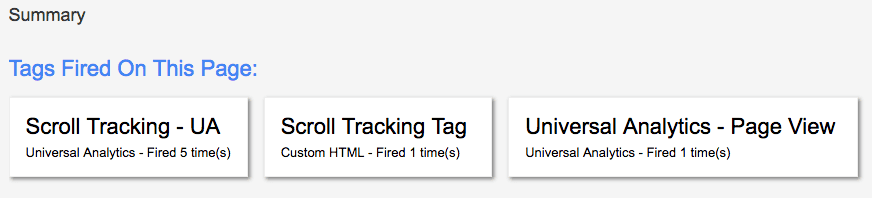
Click ‘Create Trigger’, and then save your tag. You should then use GTM’s preview mode to check whether your scroll tracking tag is firing. If it’s fired correctly, when you get to the bottom of the page, your preview window should contain the below information:
Viewing the results
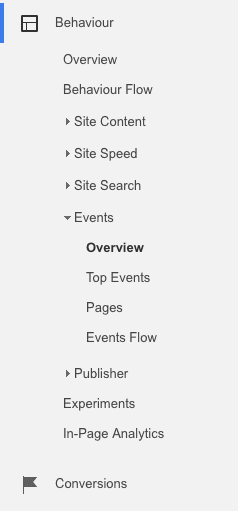
You’ll be able to analyse the results of your scroll tracking implementation in the events report in Google Analytics after a few hours. To view your report, visit Google Analytics and locate the property you just added the scroll tracking too. You’ll need to navigate to the Behaviour reports in GA - specifically the events section:
Once there, you’ll see the events graphed like in most other reports:

To get the breakdown of the events, click ‘Event Label’, underneath the ‘Top Events’ section at the bottom left of the screenshot above. You’ll then get a breakdown as per the below:
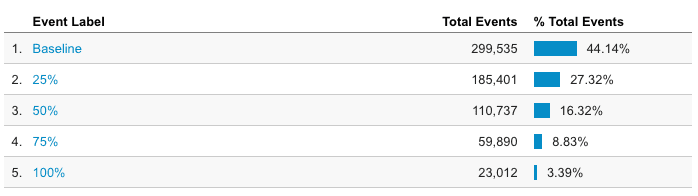
Remember, the above data is site wide, so you’ll really want to dive in a bit deeper into the data and do this analysis at a per page level, trying to spot anomalies to see on what pages people aren’t scrolling all the way down.
And that’s it! Don’t forget to ask any questions in the comments below or fire them across to me over on Twitter.
Note: The opinions expressed in this article are the views of the author, and not necessarily the views of Caphyon, its staff, or its partners.

Article by
Matthew Kay
Matthew is currently Head of Digital at Klood – an established digital and inbound marketing agency based in the UK where he oversees every aspect of Klood's services. You can find him on Twitter, LinkedIn, and occasionally watching Arsenal throw away another title.


stay in the loop