

How To Add Facebook's Tracking Pixel Using Google Tag Manager


Proving that social media is successfully driving revenue is vitally important for any organisation using the platforms - whether large or small. Whilst tracking social ROI is difficult, it's not impossible. The "big four" social networks (Facebook, Instagram, Twitter and Instagram) all provide the ability to add conversion pixels onto your website to track the progress of your advertising campaigns.
The first three (at the time of writing) even allow companies to retarget website visitors, which often results in improved conversion rates and greater revenues.In order to do this though, you need to insert their tracking pixels. My colleague has already written an article about how to insert LinkedIn’s conversion pixel using Google Tag Manager (GTM), but I wanted to cover how to install Facebook’s tracking pixel using GTM as a follow up to my scroll depth tracking post from last year. So let’s get started!
Installing the tracking pixel
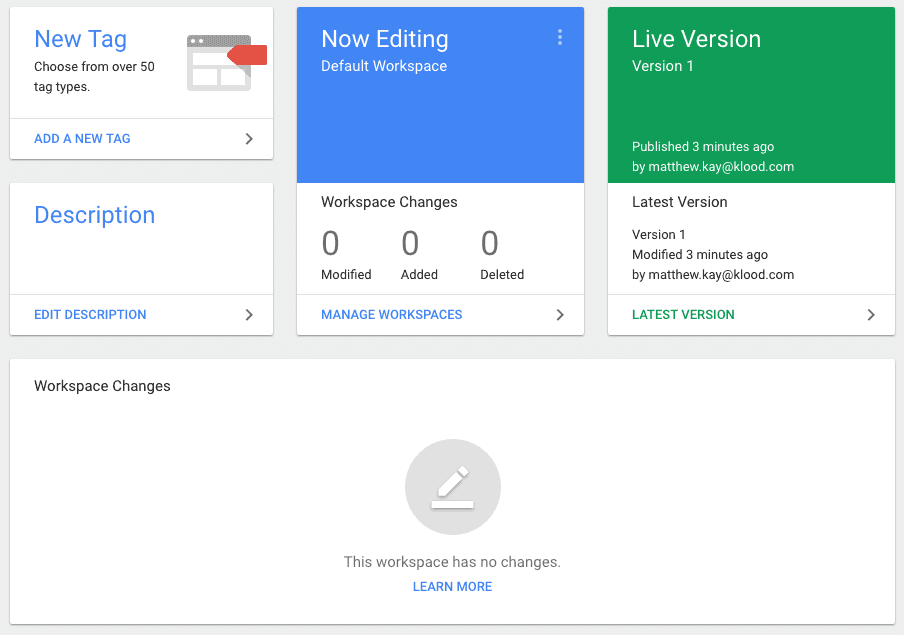
Firstly, head over to https://tagmanager.google.com and select the container you wish to insert your tracking pixel in. If you’re new to GTM, then I suggest reading my introductory guide first. Before you make any changes, make sure there are no pending changes in your current workspace. The screen you’re viewing should look like this:
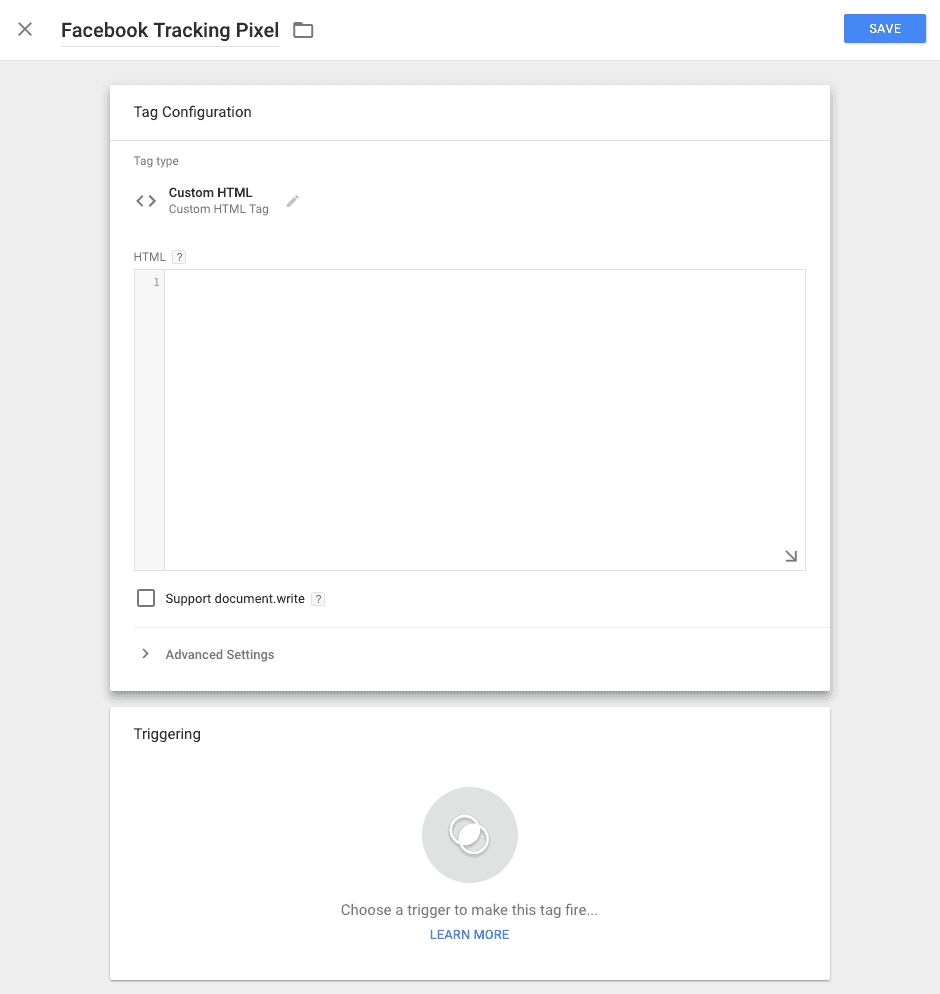
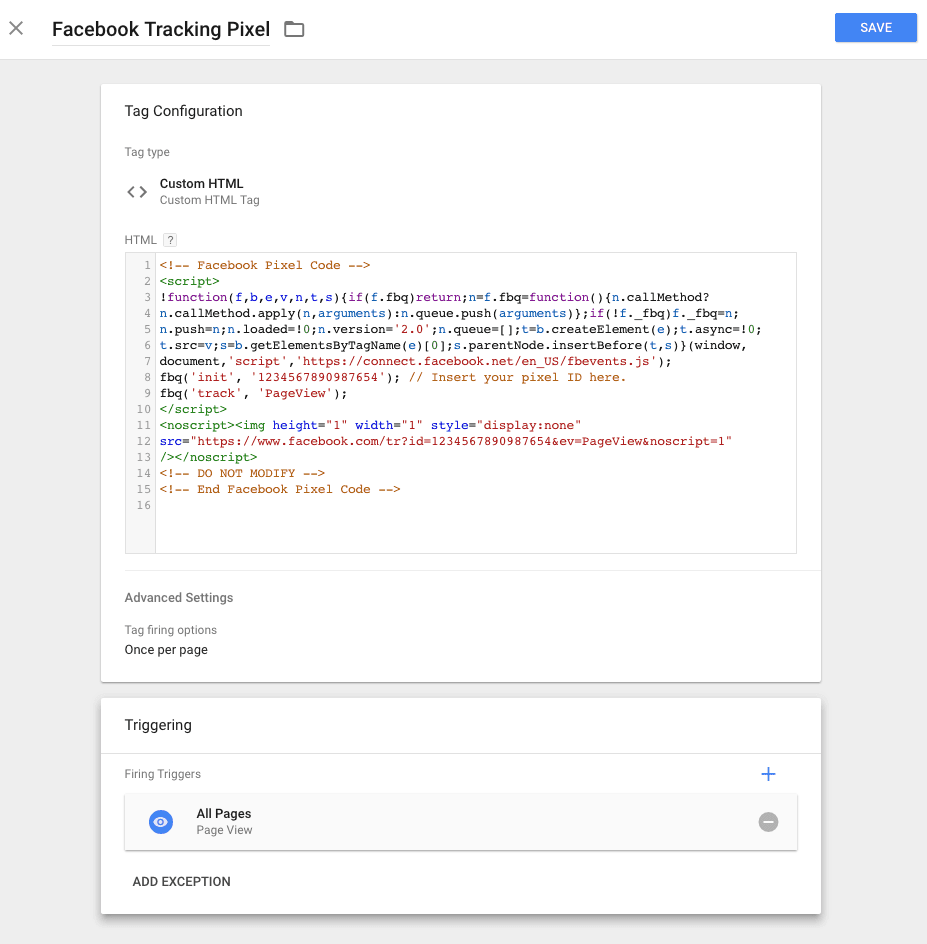
Once you have confirmed there are no changes, click "ADD A NEW TAG" from the current workspace. Name the tag appropriately - something like "Facebook Tracking Pixel" would be fine.Unfortunately, GTM doesn’t have a native integration with Facebook like it does with Twitter and LinkedIn, so you’ll need to click into the "Tag Configuration" box, and select "Custom HTML".The screen should then look like the below:
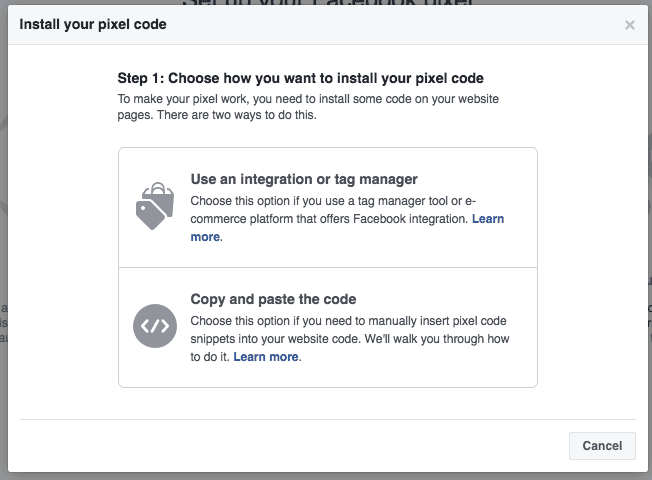
Next, you’ll need to head over to your Facebook pixel page.Make sure you’ve selected the most appropriate ad account (if you have more than one) from the drop-down in the top left.Then, click the "Actions" dropdown, and "View Pixel Code". You’ll then need to copy the code and paste it into the empty HTML field in the above screenshot.If you’ve not got a pixel setup, you’ll need to set one up. If anything, it’s actually slightly easier to follow the instructions here as Facebook will ask you how you’re installing the code (as per the screenshot below):
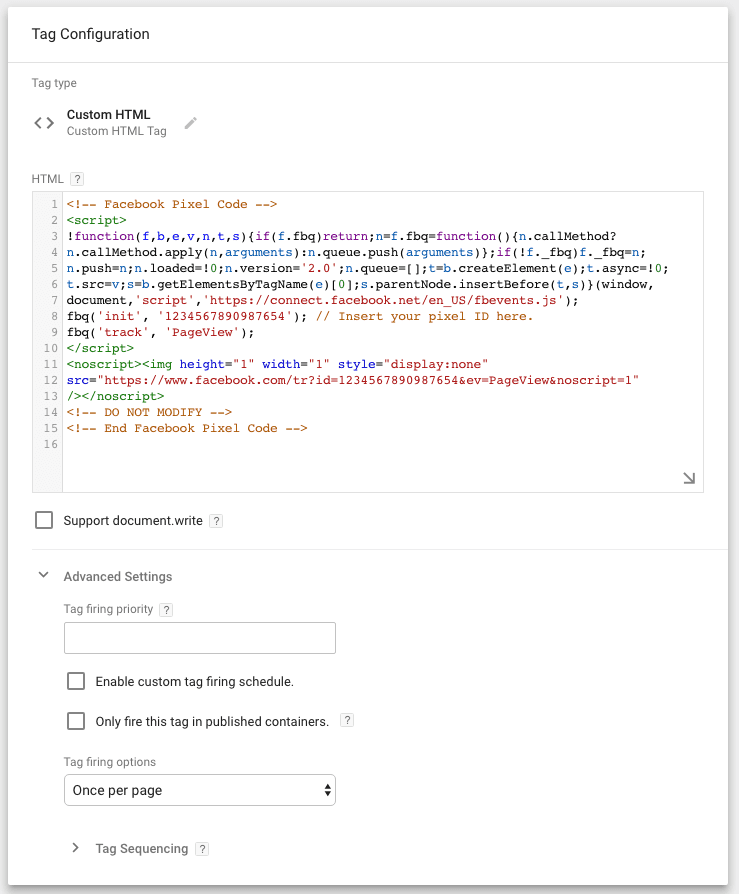
You then just need to follow their instructions to get setup, but essentially it’s the same thing. Copy the code and paste it into the HTML field.Facebook also provides a useful video if you’re setting up Facebook pixels using GTM for the first time.Then, click the "Advanced Settings" dropdown and select the "Once per page" option from the "Tag firing options" dropdown:
Once that's done, you'll then need to decide when the tag should be published. Click into the trigger configuration box and select "All Pages":
If you’re using staging and live domains within the same tag manager installation, I’d recommend creating a rule that only fires the code when the hostname is the live website, otherwise you may find your tag firing on your development website. Alternatively, you could create an exception to your trigger - either would work effectively.You can also start to add additional functionality to your Facebook pixel via GTM by creating action-specific tags such as adding a product to a cart or what a user searches - but that involves some custom implementation. Here, Facebook provides some useful instructions on how to dive into each of the events that they offer, and the sort of information that can be sent back to Facebook. You can choose to either send these events on either page load, or when a user completes an action. This sort of implementation is a bit more advanced, so I’d do your reading up on Facebook’s developer site before going down this route.
Checking it all works
The next thing you need to do is check that it all works correctly! You should use the preview mode that GTM offers before publishing your container. Then, visit a web page where the pixel has been placed. In most instances that should be any page on the website. If you return to the pixel page on Facebook, you should see the status of your pixel set to "Active". If you see "No activity yet" or "No recent activity", it’s likely there’s a problem.
You can then use the Facebook Pixel Helper in Chrome to help diagnose your pixel problems - the helper also offers suggestions as to why the pixel may have failed.After you’ve checked everything is working - that should be it. You should then start checking out some of Facebook’s more advanced marketing tactics such as Custom Audiences in order to take your social media marketing to the next level. If you’ve got any questions - don’t hesitate to fire them over on Twitter.
Note: The opinions expressed in this article are the views of the author, and not necessarily the views of Caphyon, its staff, or its partners.

Article by
Matthew Kay
Matthew is currently Head of Digital at Klood – an established digital and inbound marketing agency based in the UK where he oversees every aspect of Klood's services. You can find him on Twitter, LinkedIn, and occasionally watching Arsenal throw away another title.


stay in the loop